
트위터 클론코딩 – 노마드 코더 Nomad Coders
React Firebase for Beginners
nomadcoders.co

Firebase란?
구글이 운영하는 백엔드 서비스를 제공하는 앱 개발 도구로 프론트에서 파이어베이스를 사용하여 백엔드를 쉽게 구현할 수 있다. Authentication, DB, Cloud Storage 등을 제공하는 것이 장점이며 호스팅 기능 또한 제공한다. 무료로 사용할 경우 쿼리 할당량이 정해져 있지만 개인 프로젝트 수준에서 사용할 경우 무료 버전으로도 충분히 사용이 가능하다.
Firebase | Google's Mobile and Web App Development Platform
개발자가 사용자가 좋아할 만한 앱과 게임을 빌드하도록 지원하는 Google의 모바일 및 웹 앱 개발 플랫폼인 Firebase에 대해 알아보세요.
firebase.google.com
Firebase 세팅(리액트, 타입스크립트 환경)
파이어베이스 콘솔 페이지 -> 프로젝트 만들기 -> Firebase SDK 추가
npm install firebase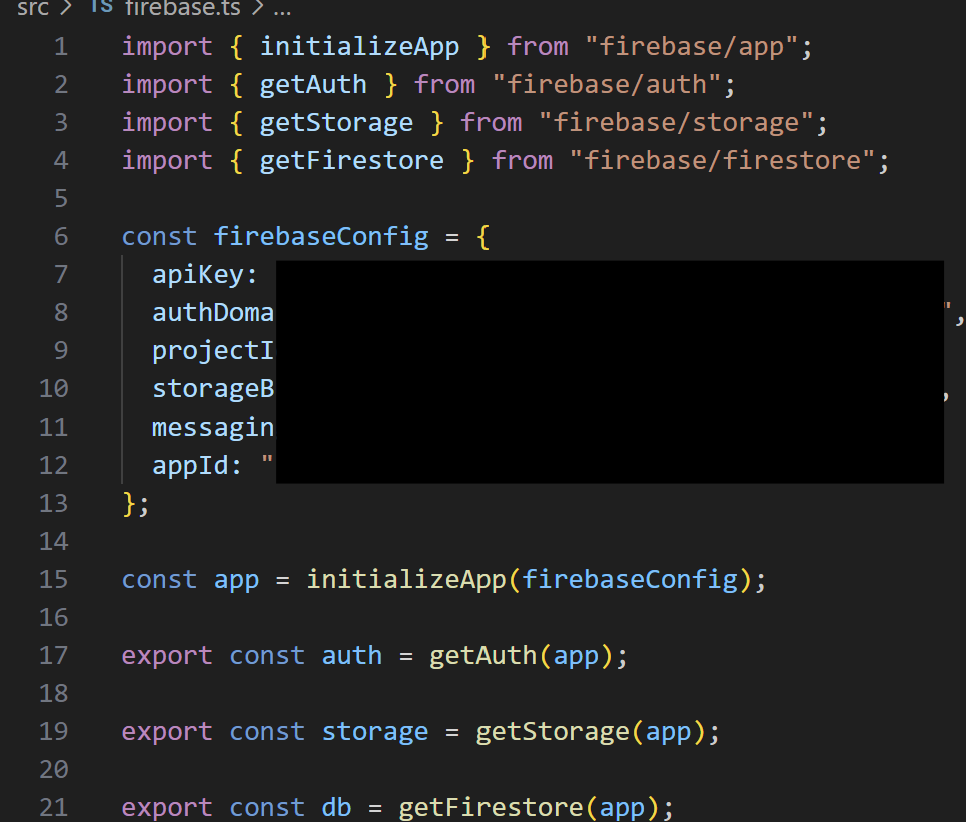
src 폴더 아래 firebase.ts 파일로 저장해 준다. 처음에는 app만 정의되어 있는데 계정인증, 저장소, DB 등의 기능을 사용하려면 위와 같이 정의해주어야 한다.
(* 파이어베이스 버전 9.6.1을 사용하였음.)
Router 설정
// App.tsx
const router = createBrowserRouter([
  {
    path: "/",
    element: (
      <ProtectedRoute>
        <Layout />
      </ProtectedRoute>
    ),
    children: [
      {
        path: "",
        element: <Home />,
      },
      {
        path: "profile",
        element: <Profile />,
      },
      {
        path: "settings",
        element: <Settings />,
      },
    ],
  },
  {
    path: "/login",
    element: <Login />,
  },
  {
    path: "/create-account",
    element: <CreateAccount />,
  },
  {
    path: "/change-password",
    element: <ChangePassword />,
  },
]);createBrowserRouter를 사용해서 RouterProvider로 App에 추가해준다.
트위터 페이지의 경우 로그인한 사용자만 홈 화면을 볼 수 있어야 한다. 이를 구현하기 위해 ProtectedRoute 함수를 정의하여 레이아웃으로 사용한다.
// protected-route.tsx
// 로그인한 사용자만 protected-route를 보고,
// 로그인하지 않은 사용자는 login 또는 create-account 페이지로 리디렉션

import { Navigate } from "react-router-dom";
import { auth } from "../firebase";

// Home과 Profile, Settings가 children으로 전달된다
export default function ProtectedRoute({ children }: { children: React.ReactNode }) {
  const user = auth.currentUser;
  // currentUser : 로그인한 사용자의 경우 User 정보,
  // 로그인하지 않았다면 null을 리턴
  if (user === null) {
    return <Navigate to="/login" />;
  }

  return children;
}
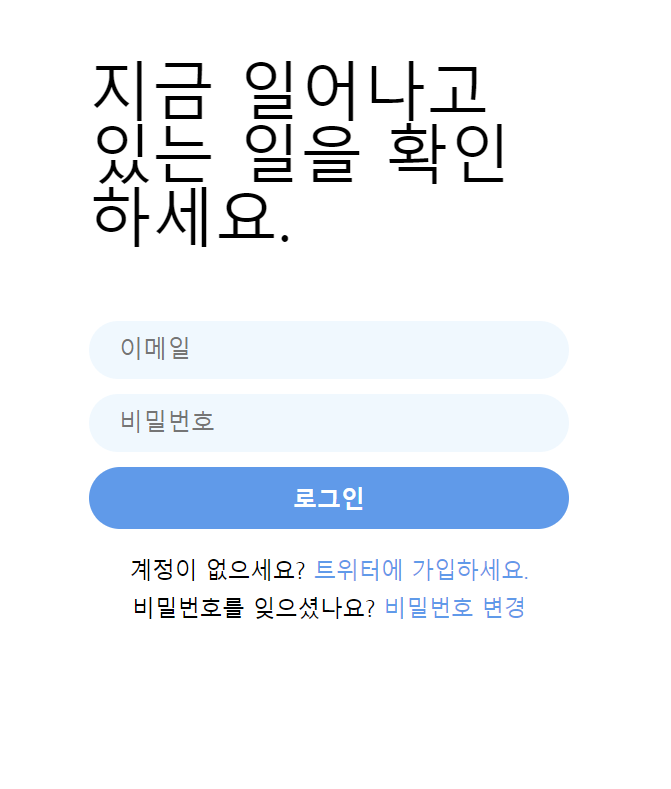
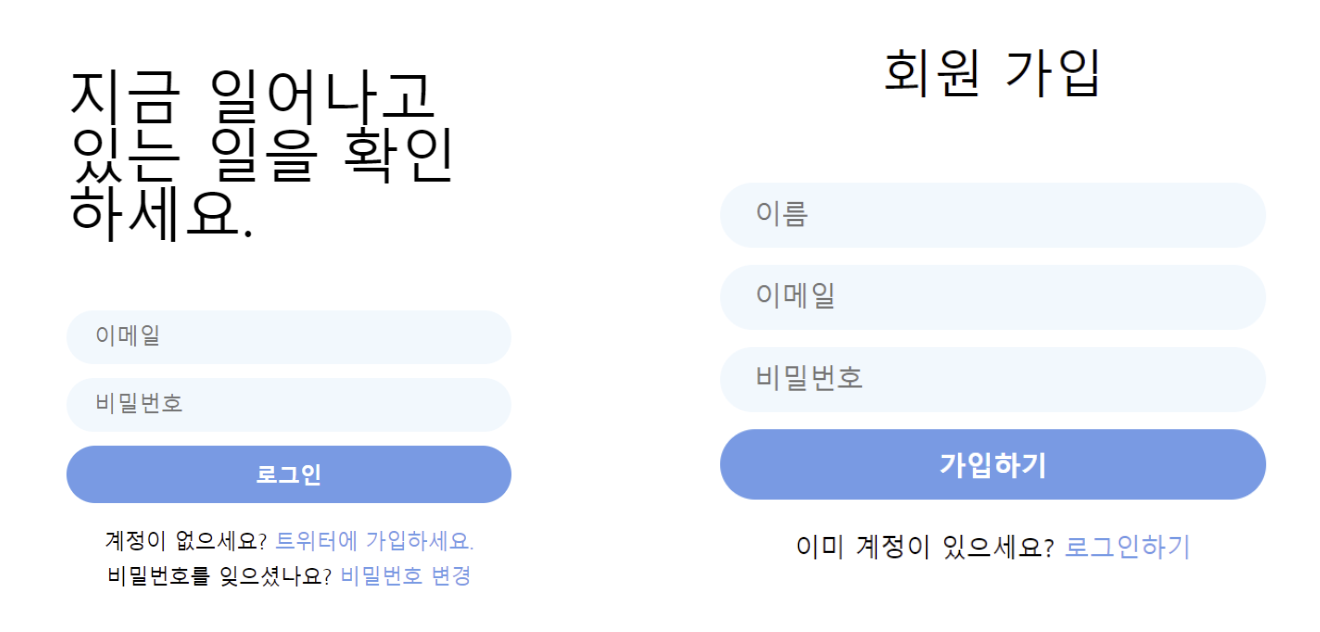
로그인, 회원가입 페이지
// create-account.tsx
  const createUserDocument = async (user: User) => {
    const userDocRef = doc(db, "users", user.uid);
    const displayId = user.email?.split("@")[0]; // 이메일의 @ 앞부분을 id로 설정
    try {
      await setDoc(userDocRef, {
        displayId,
        displayName: user.displayName || "Anonymous",
        email: user.email || "",
      });
    } catch (error) {
      console.error("Error creating user document:", error);
    }
  };

  const onSubmit: SubmitHandler<IFormInput> = async (data) => {
    const { name, email, password } = data;
    setError("");
    if (isLoading) return;
    try {
      setLoading(true);
      // 계정생성 -> name 설정 -> Home으로 리다이렉트
      const credentials = await createUserWithEmailAndPassword(auth, email, password);
      await updateProfile(credentials.user, { displayName: name });
      // 유저 정보 doc 생성
      await createUserDocument(credentials.user);
      navigate("/");
    } catch (e) {
      if (e instanceof FirebaseError) {
        setError(e.message);
      }
    } finally {
      setLoading(false);
    }
};회원 가입할 경우 사용자 정보로 이름, 이메일, 비밀번호를 받는다. 유저 정보는 파이어베이스 DB에 users라는 컬렉션에 doc으로 저장된다. 이는 트위터 화면에서 유저 정보를 doc을 통해 쉽게 불러오게 하기 위함이다.


트위터의 경우 위처럼 유저 아이디가 @ 형식으로 존재하는데, 이와 비슷하게 구현하기 위해 유저의 이메일 앞부분을 유저 아이디로 사용하도록 하였다.
// login.tsx
  const onSubmit: SubmitHandler<IFormInput> = async ({ email, password }) => {
    setError("");
    if (isLoading) return;
    try {
      setLoading(true);
      await signInWithEmailAndPassword(auth, email, password);
      navigate("/");
    } catch (e) {
      if (e instanceof FirebaseError) {
        setError(e.message);
      }
    } finally {
      setLoading(false);
    }
};로그인 페이지에서 signInWithEmailAndPassword()라는 파이어베이스 함수를 통해 로그인한다. 로그인한 사용자는 트위터 홈 화면으로 네비게이트된다.
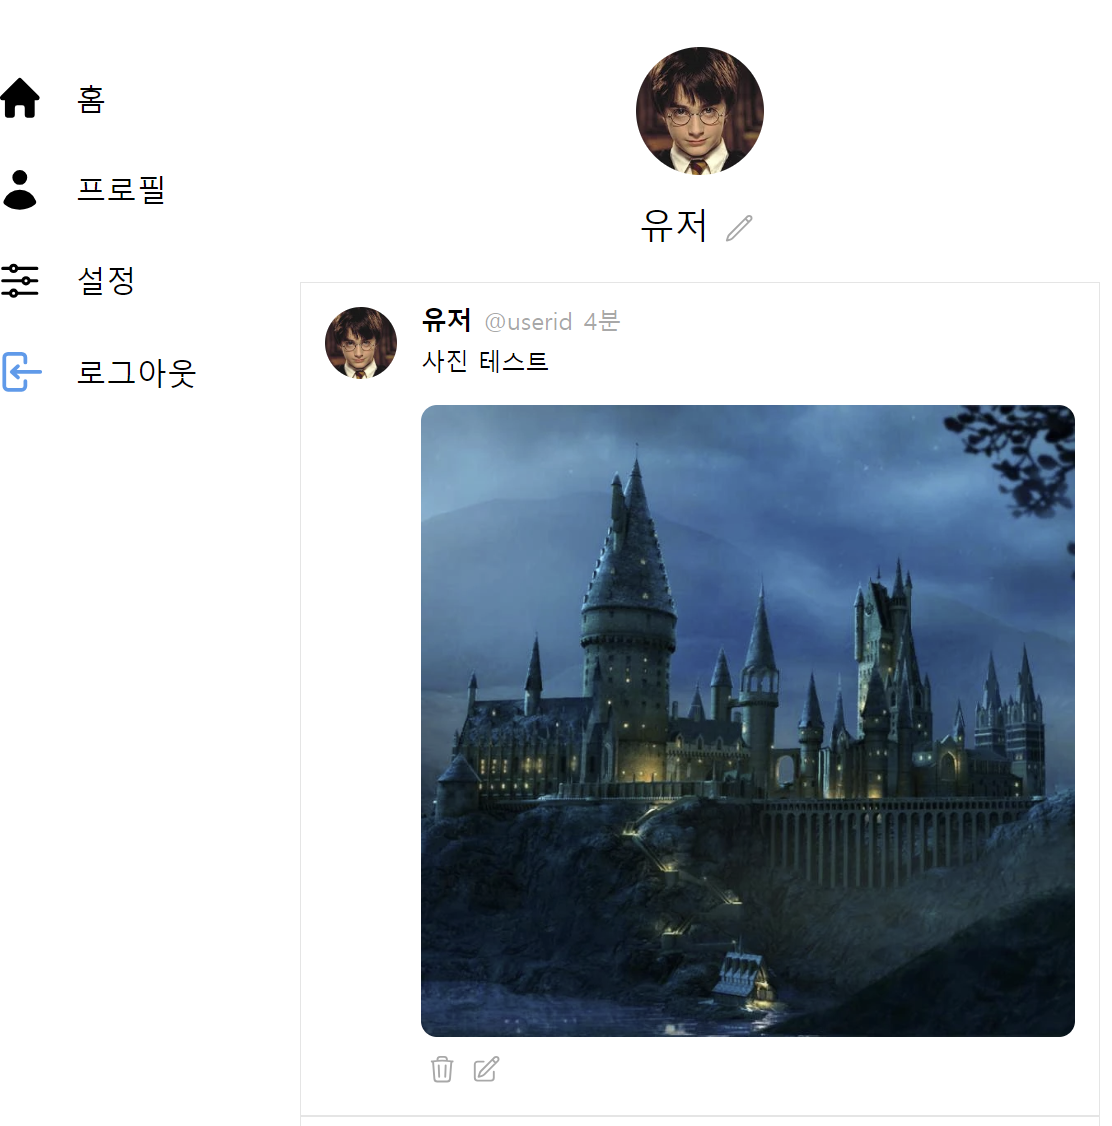
홈 화면
앞서 라우터에서 정의해준 레이아웃은 좌측 메뉴바+우측 칠드런 구조로 되어 있다.

// layout.tsx
  return (
    <Wrapper>
      <Menu>
        <StyledLink to="/">
          <MenuItem>
            <MenuIcon>
              // svg... 너무 길어서 생략
            </MenuIcon>
            <p>홈</p>
          </MenuItem>
        </StyledLink>
        <StyledLink to="/profile">
          <MenuItem>
            <MenuIcon>
             // svg...
            </MenuIcon>
            <p>프로필</p>
          </MenuItem>
        </StyledLink>
        <StyledLink to="/settings">
          <MenuItem>
            <MenuIcon>
             // svg...
            </MenuIcon>
            <p>설정</p>
          </MenuItem>
        </StyledLink>
        <MenuItem onClick={onLogOut}>
          <MenuIcon className="log-out">
            // svg...
          </MenuIcon>
          <p>로그아웃</p>
        </MenuItem>
      </Menu>
      <Outlet />
    </Wrapper>
);사이드 메뉴바는 어느 화면에서든 보여야 하기 때문에 레이아웃으로 정의해준다.
Outlet이란 react router dom에서 제공하는 컴포넌트로 중첩 라우팅 기능을 제공한다. 라우터에서 정의한 대로 레이아웃과 함께 칠드런들이 렌더링된다.
프로젝트에서 사용한 svg 아이콘들은 Heroicons 페이지에서 받아와 사용하였다.
Heroicons
Beautiful hand-crafted SVG icons, by the makers of Tailwind CSS.
heroicons.com
트윗 게시 Form
문장을 쓸 때마다 textarea 크기가 자동 조절되도록 하기 위해 onChange 함수를 다음과 같이 작성해주었다.
// post-tweet-form.tsx
 const handleChange = (e: React.ChangeEvent<HTMLTextAreaElement>) => {
    setTweet(e.target.value);

    // Textarea 높이 조절
    const textArea = textAreaRef.current;
    if (textArea) {
      textArea.style.height = "auto";
      textArea.style.height = `${textArea.scrollHeight}px`;
    }
  };
useRef를 통해 textAreaRef를 생성해준 후 scrollHeight가 변경되면 textArea 스타일이 변경되도록 하는 구조이다.
// post-tweet-form.tsx
  const onSubmit = async (e: React.FormEvent<HTMLFormElement>) => {
    // 트윗 추가
    e.preventDefault();
    const user = auth.currentUser; // 로그인 유저 정보
    if (!user || isLoading || tweet === "" || tweet.length > 180) return;
    try {
      setLoading(true);
      // 새로운 Document 생성(Firebase)
      // tweets 컬렉션에 두번째 인자를 Doc로 추가
      const doc = await addDoc(collection(db, "tweets"), {
        tweet,
        createdAt: Date.now(),
        username: user.displayName || "Anonymous",
        userId: user.uid,
      });
      // 파일 첨부된 경우
      if (file) {
        const locationRef = ref(storage, `tweets/${user.uid}/${doc.id}`);
        const result = await uploadBytes(locationRef, file);
        const url = await getDownloadURL(result.ref);
        await updateDoc(doc, { photo: url });
      }
      // 유저 아바타가 있는 경우
      try {
        const locationRef = ref(storage, `avatars/${user?.uid}`);
        if (locationRef) {
          const avatarUrl = await getDownloadURL(locationRef);
          await updateDoc(doc, { avatar: avatarUrl });
        }
      } catch {
        // do nothing
      }

      setTweet("");
      setFile(null);
      if (textAreaRef.current) {
        textAreaRef.current.style.height = "auto";
      }
    } catch (e) {
      console.log(e);
    } finally {
      setLoading(false);
    }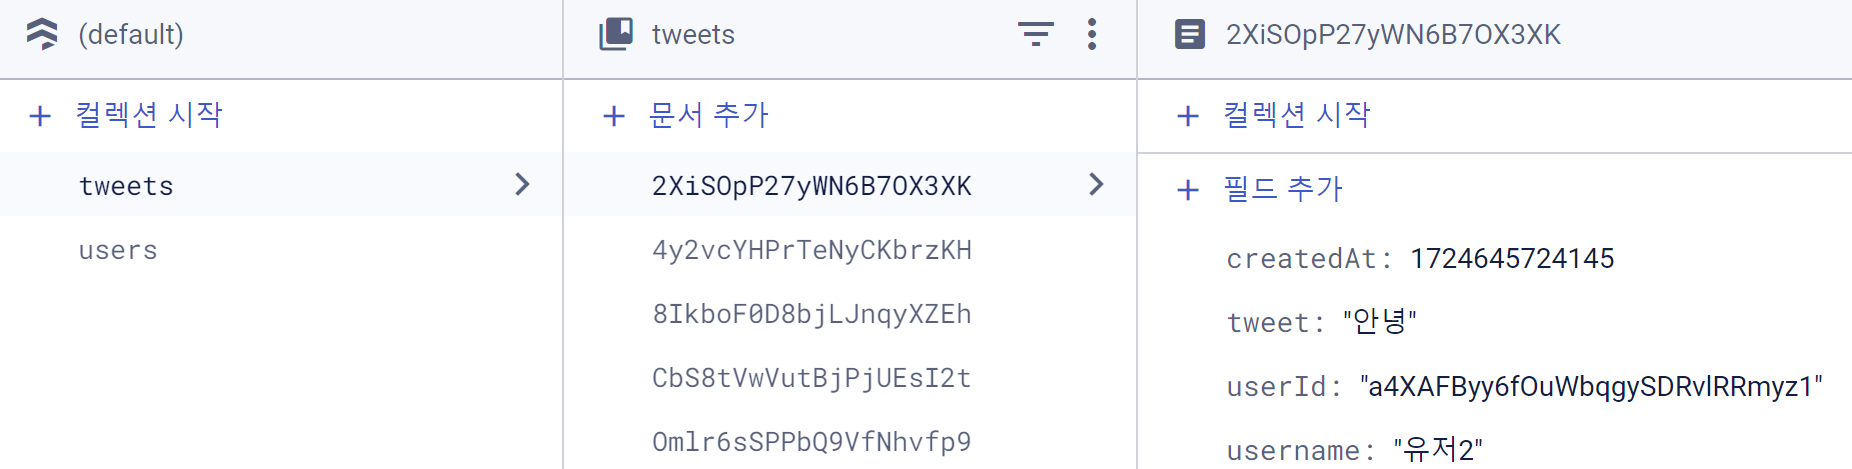
};from에 onSubmit함수를 연결해 준다. onSubmit 함수에서는 트윗 게시 과정이 일어난다. 로그인 유저 정보를 받아와 tweets 컬렉션에 doc으로 트윗을 저장한다.
만약 사진이나 유저 프로필 사진이 포함된 트윗일 경우 따로 Storage에 저장해서 불러오는 과정이 필요하다. 파일을 Storage에 저장한 후 Url은 doc에 저장한다. 트윗을 불러올 때는 doc에 저장된 파이어베이스 storage url을 통해 불러올 수 있다.
// post-tweet-form.tsx
return (
    <Form onSubmit={onSubmit}>
      <TextArea
        ref={textAreaRef}
        required
        rows={1}
        maxLength={180}
        onChange={handleChange}
        value={tweet}
        placeholder="무슨 일이 일어나고 있나요?"
      />
      <AttachFileButton htmlFor="file">{file ? "사진 추가됨✅" : "사진 추가"}</AttachFileButton>
      <AttachFileInput
        onChange={onFileChange}
        type="file"
        id="file"
        accept="image/*"
      />
      <SubmitBtn
        type="submit"
        value={isLoading ? "게시중..." : "게시하기"}
      />
    </Form>
  );
타임라인
// timeline.tsx
export interface ITweet {
  id: string;
  photo?: string;
  tweet: string;
  userId: string;
  username: string;
  createdAt: number;
  avatar?: string;
}

// style 생략

export default function Timeline() {
  const [tweets, setTweet] = useState<ITweet[]>([]);
  useEffect(() => {
    let unsubscribe: Unsubscribe | null = null;
    const fetchTweets = async () => {
      const tweetsQuery = query(collection(db, "tweets"), orderBy("createdAt", "desc"), limit(25));

      // onSnapshot: doc이 편집, 수정될 때마다 query를 바로 받아옴
      unsubscribe = await onSnapshot(tweetsQuery, (snapshot) => {
        const tweets = snapshot.docs.map((doc) => {
          const { tweet, createdAt, userId, username, photo, avatar } = doc.data();
          return { tweet, createdAt, userId, username, photo, id: doc.id, avatar };
        });
        setTweet(tweets);
      });
    };
    fetchTweets();
    return () => {
      // 유저가 타임라인을 보고 있을 때만 이벤트를 발생시키기 위해 cleanup을 사용
      // 타임라인에 들어올 때 구독되고 타임라인에서 나가면 unsubscribe 함
      unsubscribe && unsubscribe();
    };
  }, []);

  return (
    <Wrapper>
      {tweets.map((tweet) => (
        <Tweet
          key={tweet.id}
          {...tweet}
        />
      ))}
    </Wrapper>
  );
}타임라인에서는 Tweet 컴포넌트를 통해 파이어베이스에 저장된 트윗을 불러온다. 이 때 unsubscribe를 사용하는 이유는 자원 절약을 위함이다.
onSnapshot을 사용하는 이유는 DB를 실시간 반영하기 위해서이다. doc이 변경될 때마다 쿼리를 실시간으로 받아오므로 유저는 새로고침을 할 필요가 없다.
자신이 작성한 트윗에는 수정, 삭제 버튼이 표시되며 트윗을 수정하거나 삭제할 수 있다.
삭제 함수
// tweet.tsx
  const onDelete = async () => {
    const check = confirm("트윗을 삭제하시겠습니까?");
    if (!check || user?.uid !== userId) return;
    try {
      await deleteDoc(doc(db, "tweets", id));
      if (photo) {
        const photoRef = ref(storage, `tweets/${user.uid}/${id}`);
        await deleteObject(photoRef);
      }
    } catch (e) {
      console.log(e);
    }
  };
수정 함수
수정 폼은 수정 모드가 활성화될 때만 보여야 한다. useState로 상태를 관리한다.
// tweet.tsx
  const [isEditing, setIsEditing] = useState(false);
  const [newTweet, setNewTweet] = useState(tweet);
  const [newPhoto, setNewPhoto] = useState<File | null>(null);

  ...

  const onEdit = async () => {
    if (user?.uid !== userId) return;
    setIsEditing(true);
  };

  const onCancelEdit = () => {
    setIsEditing(false);
    setNewTweet(tweet);
    setNewPhoto(null);
  };

  const onSubmitEdit = async () => {
    if (loading || user === null || newTweet === "" || newTweet.length > 180) return;
    try {
      setLoading(true);
      const tweetDocRef = doc(db, "tweets", id);
      // 텍스트 업데이트
      await updateDoc(tweetDocRef, { tweet: newTweet });
      // 사진 업데이트
      if (newPhoto) {
        const photoRef = ref(storage, `tweets/${user.uid}/${id}`);
        // 이전 사진이 있는 경우 삭제
        if (photo) {
          const oldPhotoRef = ref(storage, `tweets/${user.uid}/${id}`);
          await deleteObject(oldPhotoRef);
        }
        const uploadResult = await uploadBytes(photoRef, newPhoto);
        const newPhotoURL = await getDownloadURL(uploadResult.ref);
        await updateDoc(tweetDocRef, { photo: newPhotoURL });
      }

      setIsEditing(false);
      setNewPhoto(null);
    } catch (e) {
      console.log(e);
    } finally {
      setLoading(false);
    }
};사진을 변경하거나 추가할 경우 이전 사진이 존재한다면 Storage에서 삭제하는 과정이 필요하다. doc을 업데이트하는 것은 updateDoc을 호출하기만 하면 간단하게 할 수 있다.
프로필 페이지


// profile.tsx
  const onAvatarChange = async (e: React.ChangeEvent<HTMLInputElement>) => {
    const { files } = e.target;
    if (!user) return;
    if (files && files.length === 1) {
      const file = files[0];
      // 새로운 이미지를 등록하면 덮어쓰기하도록 경로 지정
      const locationRef = ref(storage, `avatars/${user?.uid}`);
      const result = await uploadBytes(locationRef, file);
      const avatarUrl = await getDownloadURL(result.ref);
      setAvatar(avatarUrl);
      await updateProfile(user, { photoURL: avatarUrl });
    }
  };

  const onNameChange = async () => {
    if (!user || newName === user.displayName) {
      alert("닉네임을 변경해 주세요.");
      return;
    } // 사용자가 변경하지 않은 경우
    try {
      await updateProfile(user, { displayName: newName });
      // doc 업데이트
      const userDocRef = doc(db, "users", user.uid);
      await updateDoc(userDocRef, { displayName: newName });
      setIsEditing(false); // 수정 완료 후 입력 모드를 종료
    } catch (error) {
      console.error("Failed to update user name:", error);
    }
  };
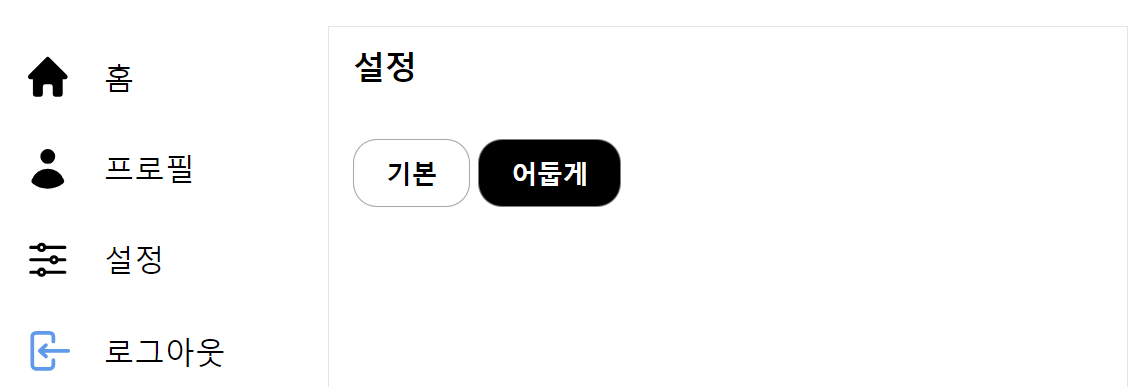
테마 설정 페이지
기존의 트위터에서 페이지 테마 변경 기능을 제공하기 때문에 비슷하게 기본 테마와 어두운 테마를 구현하였다.
테마 기능을 구현하기 위해선 theme.ts파일을 따로 작성해 주어야 하고 App에 ThemeProvider를 임포트해야 한다.
// theme.ts
import { DefaultTheme } from "styled-components";

export const lightTheme: DefaultTheme = {
  bgColor: "white",
  inputColor: "#edf8ff",
  textColor: "black",
  themeColor: "#1d9bf0",
  hoverColor: "rgba(0, 0, 0, 0.1)",
  borderColor: "rgba(82, 82, 82, 0.5)",
};

export const darkTheme: DefaultTheme = {
  bgColor: "black",
  inputColor: "white",
  textColor: "white",
  themeColor: "#1d9bf0",
  hoverColor: "rgba(255, 255, 255, 0.2)",
  borderColor: "rgba(255, 255, 255, 0.5)",
};
// App.tsx
interface ThemeContextType {
  theme: DefaultTheme;
  setLightTheme: () => void;
  setDarkTheme: () => void;
}

const ThemeContext = createContext<ThemeContextType | undefined>(undefined);

...

function App() {
  const [isLoading, setLoading] = useState(true);
  const [theme, setTheme] = useState<DefaultTheme>(lightTheme);

  useEffect(() => {
    const savedTheme = localStorage.getItem("appTheme");
    if (savedTheme === "light") {
      setTheme(lightTheme);
    } else {
      setTheme(darkTheme);
    }

    init();
  }, []);

  const setLightTheme = () => {
    setTheme(lightTheme);
    localStorage.setItem("appTheme", "light");
  };
  const setDarkTheme = () => {
    setTheme(darkTheme);
    localStorage.setItem("appTheme", "dark");
  };

  return (
    <Wrapper>
      <ThemeContext.Provider value={{ theme, setLightTheme, setDarkTheme }}>
        <ThemeProvider theme={theme}>
          <GlobalStyles />
          {isLoading ? <LoadingScreen /> : <RouterProvider router={router} />}
        </ThemeProvider>
      </ThemeContext.Provider>
    </Wrapper>
  );
}

export default App;테마가 실시간으로 적용되도록 하기 위해 createContext를 사용하였다.
// settings.tsx
  const { setLightTheme, setDarkTheme } = useThemeContext();

  return (
    <Wrapper>
      <Title>설정</Title>
      <ToggleList>
        <ToggleButton
          className="light"
          onClick={setLightTheme}
        >
          기본
        </ToggleButton>
        <ToggleButton
          className="dark"
          onClick={setDarkTheme}
        >
          어둡게
        </ToggleButton>
      </ToggleList>
    </Wrapper>
);이후는 전체 페이지에 테마 적용을 위해 styled components마다 props로 테마를 연결해주면 된다.
'리액트' 카테고리의 다른 글
| [React] 리액트 자바스크립트 라이브러리를 사용하는 이유, 특징, 장단점 (0) | 2025.01.23 |
|---|---|
| [React] @font-face를 이용할 때의 폰트 깜빡임(Flash of Unstyled Text, FOUT) 현상 (0) | 2025.01.06 |
| [React] react-js-pagination를 이용한 페이지네이션(Pagination) 구현 (0) | 2024.11.12 |